Introduction
By extending declarative agents with actions, you can connect them to external systems and services through their APIs. Connecting an agent to your existing systems can help you automate tasks and get insights using natural language. To improve the user experience, you can use Adaptive Cards to render information that the agent retrieves from APIs in a visually appealing way.
Example scenario
Suppose you’ve recently built a declarative agent that integrates with an API of a local restaurant. Using the agent you can browse today’s menu and place an order using natural language. The restaurant’s API provides a detailed list of dishes, their ingredients, and allergens. You want to enhance the agent’s responses by rendering the information about dishes using Adaptive Cards. You also want to render the order summary using an Adaptive Card to provide a visual representation of the order. By using Adaptive Cards, you can include images, text, and buttons to make the information more engaging.
What will we be doing?
In this module, you extend an existing API plugin for a declarative agent to render information that it receives from an API using Adaptive Cards. You learn to:
- Create: Create an Adaptive Card template that shows the data from the API.
- Verify: Verify that the Adaptive Card template correctly renders API data.
- Configure: Configure the API plugin to render the data using the Adaptive Card template.
- Provision: Upload your declarative agent to Microsoft 365 Copilot and validate the results.

Lab Duration
- Estimated Time to complete: 35 minutes
Learning objectives
By the end of this module, you know how to build Adaptive Card templates for use with declarative agents. You can verify that the templates render the data correctly and configure the API plugin to use the templates.
lab: title: ‘Exercise 1 - Download project and build an adaptive card’ module: ‘LAB 03: Use Adaptive Cards to show data in API plugins for declarative agents’ —
Exercise 1 - Download project and build an adaptive card
Let’s start by building Adaptive Card templates for the agent to show the data in its responses. To build the Adaptive Card template, you use the Adaptive Card Previewer Visual Studio Code extensions to easily preview your work directly in Visual Studio Code. Using the extension allows us to build an Adaptive Card template, with references to data. At runtime, the agent fills the placeholder with data it retrieves from the API.
Exercise Duration
- Estimated Time to complete: 10 minutes
Task 1 - Download the starter project
Start by downloading the sample project. In a web browser:
- Navigate to https://github.com/microsoft/learn-declarative-agent-api-plugin-adaptive-cards-typescript.
- Follow the steps to download the repository source code to your computer.
- Extract the contents of the downloaded ZIP file and extract it to your Documents folder.
- Open the folder in Visual Studio Code.
The sample project is a Teams Toolkit project that includes a declarative agent with an action built with an API plugin. The API plugin connects to an anonymous API running on Azure Functions also included in the project. The API belongs to a fictitious Italian restaurant and allows you to browse today’s menu and place orders.
Task 2 - Build an Adaptive Card for a dish
First, create an Adaptive Card that shows information about a single dish.
In Visual Studio Code:
- In the Explorer view, create a new folder named cards.
- In the cards folder, create a new file named dish.json. Paste the following contents that represent an empty Adaptive Card:
  {
    "$schema": "http://adaptivecards.io/schemas/adaptive-card.json",
    "type": "AdaptiveCard",
    "version": "1.5",
    "body": []
  }
- Before you continue, from the Extensions tab of the activity bar, search for and install the Adaptive Card Previewer extension and then create a data file for the Adaptive Card:
- Open the command palette by pressing CTRL+P on the keyboard. Type
>Adaptiveto find commands related to working with Adaptive Cards.
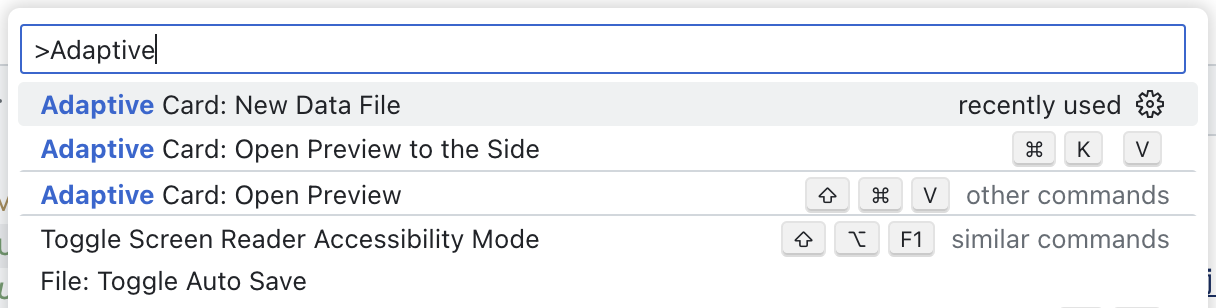
- From the list, choose Adaptive Card: New Data File. Visual Studio Code creates a new file named dish.data.json.
- Replace its contents with a data that represents a dish:
  {
    "id": 4,
    "name": "Caprese Salad",
    "description": "Juicy vine-ripened tomatoes, fresh mozzarella, and fragrant basil leaves, drizzled with extra virgin olive oil and a touch of balsamic.",
    "image_url": "https://raw.githubusercontent.com/pnp/copilot-pro-dev-samples/main/samples/da-ristorante-api/assets/caprese_salad.jpeg",
    "price": 10.5,
    "allergens": [
    "dairy"
    ],
    "course": "lunch",
    "type": "dish"
  }
- Save your changes
- Go back to the dish.json file.
- From the lens, select Preview Adaptive Card.
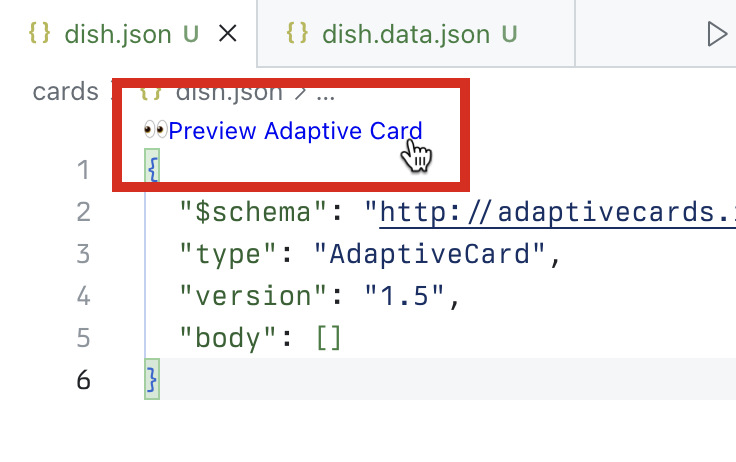
Visual Studio Code opens a preview of the card to the side. As you’re editing the card, your changes are immediately visible on the side.
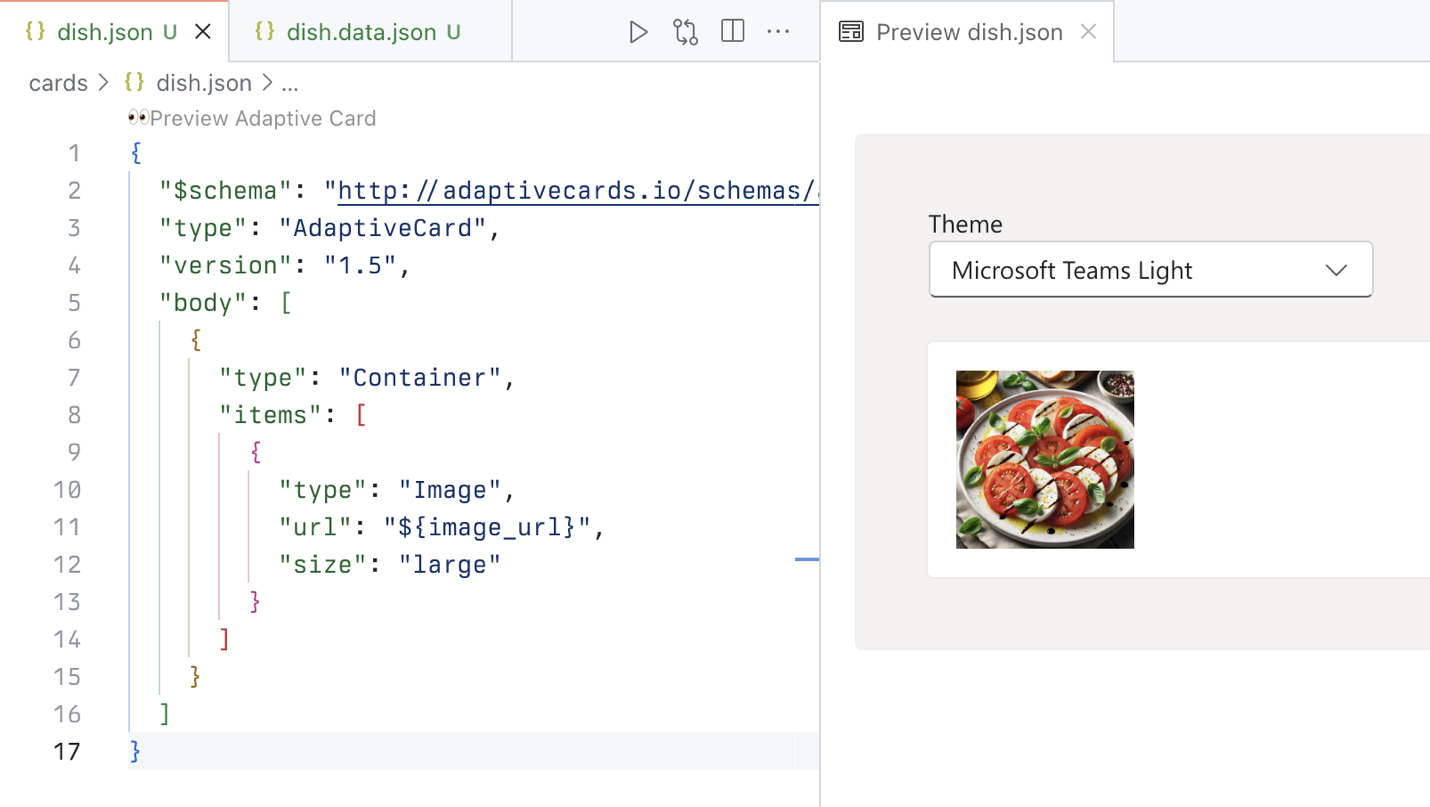
- To the body array, add a Container element with a reference to the image URL stored in the image_url property.
  {
    "type": "Container",
    "items": [
    {
      "type": "Image",
      "url": "${image_url}",
      "size": "large"
    }
    ]
  }
Notice how the card preview automatically updates to show your card:
- Add references to other dish properties. The complete card looks as follows:
  {
    "$schema": "http://adaptivecards.io/schemas/adaptive-card.json",
    "type": "AdaptiveCard",
    "version": "1.5",
    "body": [
    {
      "type": "Container",
      "items": [
      {
        "type": "Image",
        "url": "${image_url}",
        "size": "large"
      },
      {
        "type": "TextBlock",
        "text": "${name}",
        "weight": "Bolder"
      },
      {
        "type": "TextBlock",
        "text": "${description}",
        "wrap": true
      },
      {
        "type": "TextBlock",
        "text": "Allergens: ${if(count(allergens) > 0, join(allergens, ', '), 'none')}",
        "weight": "Lighter"
      },
      {
        "type": "TextBlock",
        "text": "**Price:** €${formatNumber(price, 2)}",
        "weight": "Lighter",
        "spacing": "None"
      }
      ]
    }
    ]
  }
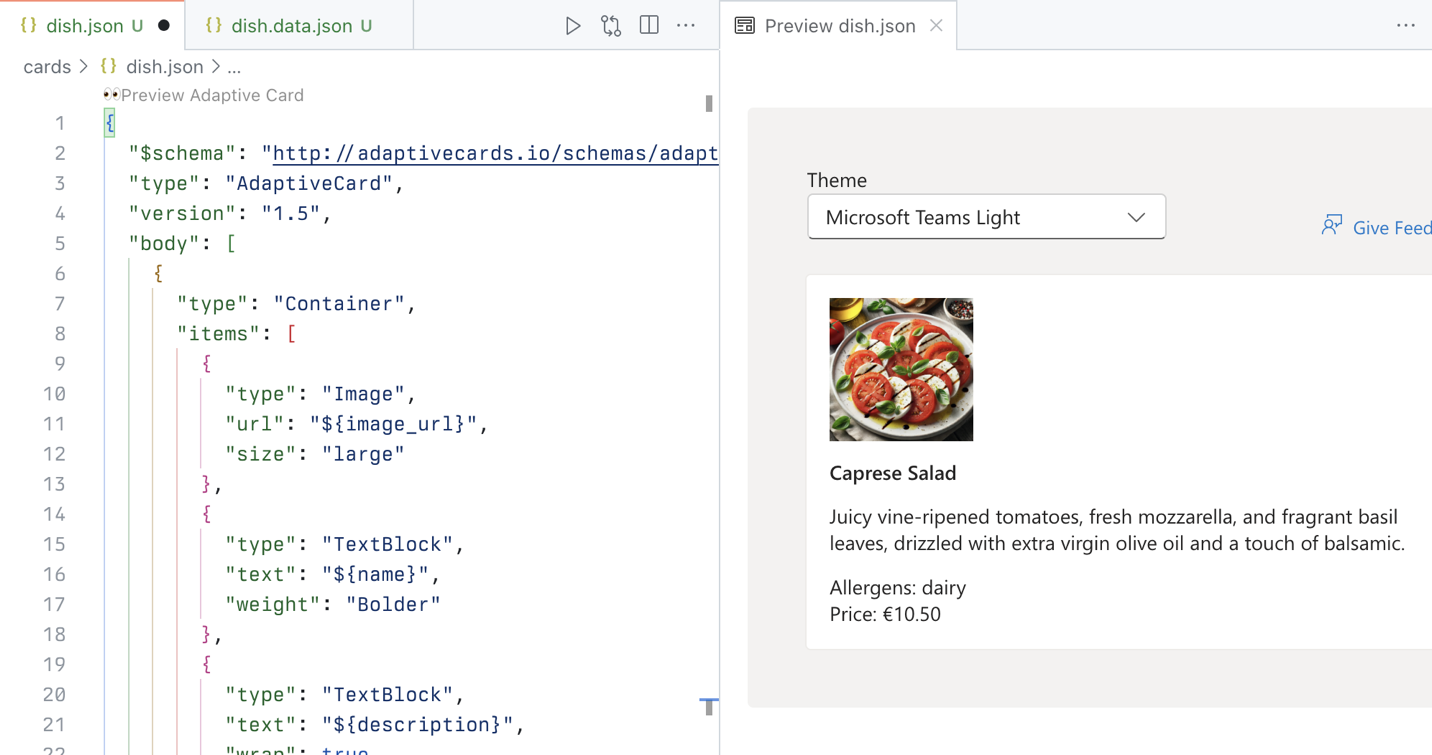
Notice that to display allergens you use a function to join the allergens into a string. If a dish doesn’t have allergens, you display none. To ensure that prices are properly formatted, you use the formatNumber function that allows us to specify the number of decimals to show on the card.
Task 3 - Build an Adaptive Card for the order summary
The sample API allows users to browse the menu and place an order. Let’s create an adaptive card that shows the order summary.
In Visual Studio Code:
- In the cards folder, create a new file named order.json. Paste the following contents that represent an empty Adaptive Card:
  {
    "$schema": "http://adaptivecards.io/schemas/adaptive-card.json",
    "type": "AdaptiveCard",
    "version": "1.5",
    "body": []
  }
- Create a data file for the Adaptive Card:
- Open the command palette by pressing CTRL+P (CMD+P on macOS) on the keyboard. Type
>Adaptiveto find commands related to working with Adaptive Cards.

- From the list, choose Adaptive Card: New Data File. Visual Studio Code creates a new file named order.data.json.
- Replace its contents with a data that represents the order summary:
```json
{
  "order_id": 6210,
  "status": "confirmed",
  "total_price": 25.48
}
```
- Save your changes
- Go back to the order.json file.
- From the lens, select Preview Adaptive Card.
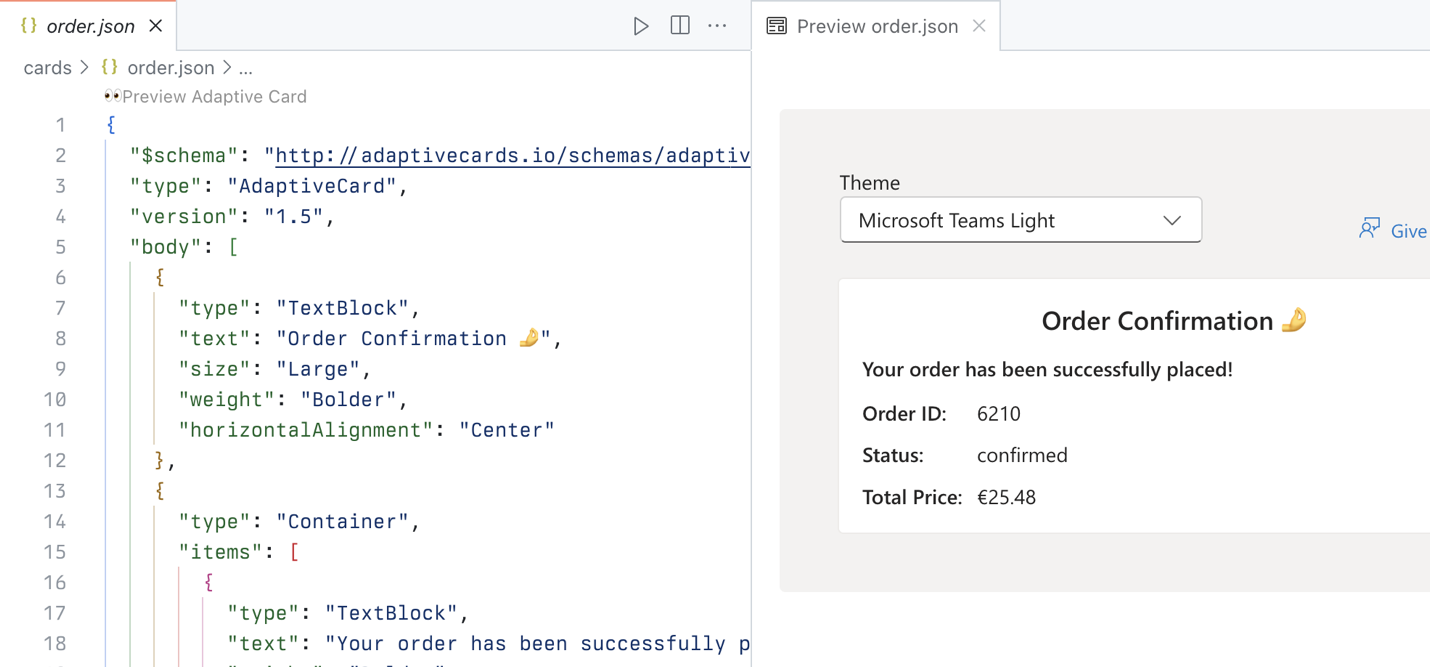
- Next, replace the contents of the order.json file with the following code:
  {
    "$schema": "http://adaptivecards.io/schemas/adaptive-card.json",
    "type": "AdaptiveCard",
    "version": "1.5",
    "body": [
    {
      "type": "TextBlock",
      "text": "Order Confirmation 🤌",
      "size": "Large",
      "weight": "Bolder",
      "horizontalAlignment": "Center"
    },
    {
      "type": "Container",
      "items": [
      {
        "type": "TextBlock",
        "text": "Your order has been successfully placed!",
        "weight": "Bolder",
        "spacing": "Small"
      },
      {
        "type": "FactSet",
        "facts": [
        {
          "title": "Order ID:",
          "value": "${order_id} "
        },
        {
          "title": "Status:",
          "value": "${status}"
        },
        {
          "title": "Total Price:",
          "value": "€${formatNumber(total_price, 2)}"
        }
        ]
      }
      ]
    }
    ]
  }
Just like in the previous section, you map each element on the card to a data property.
[!IMPORTANT] Notice the trailing space after ${order_id}. This is intentional, because of a known issue with Adaptive Cards rendering numbers. To test it, remove the space and see that the number disappears from the preview.
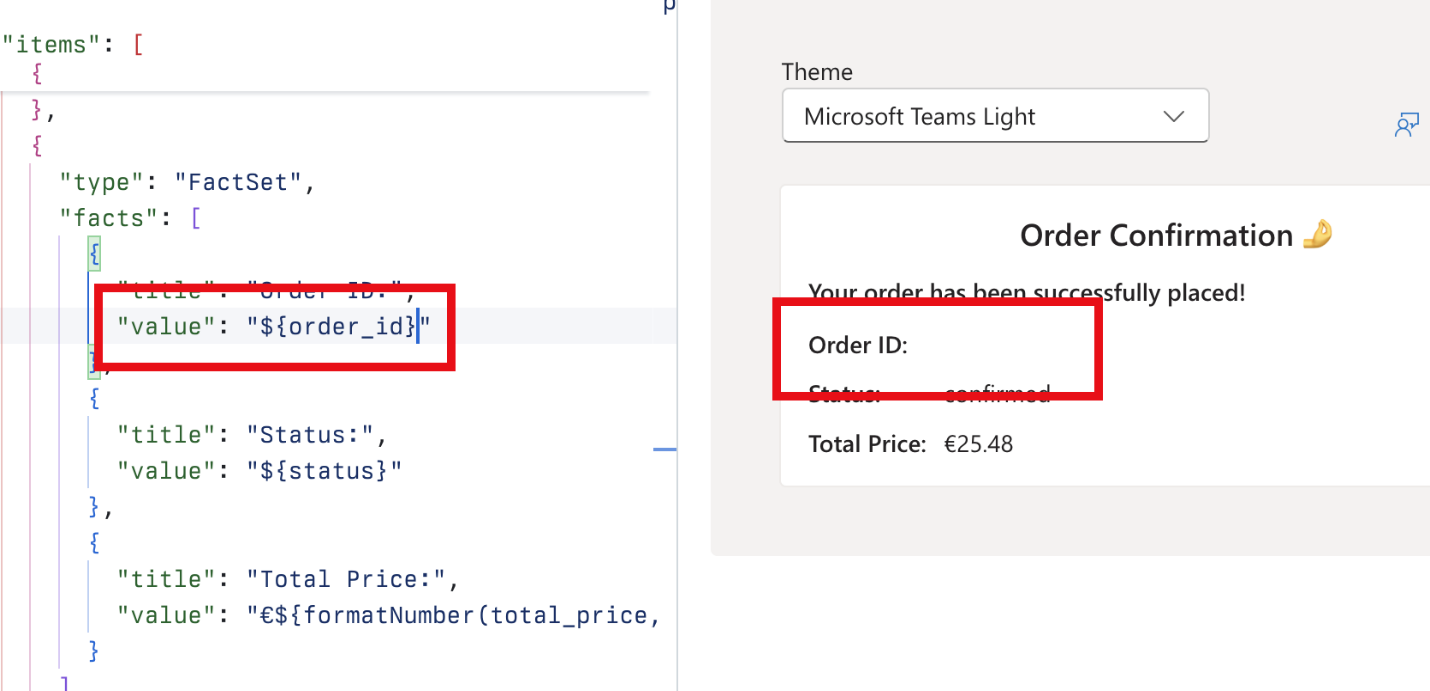
Restore the trailing space so that your card shows properly and save your changes.
lab: title: ‘Exercise 2 - Update the API plugin definition’ module: ‘LAB 03: Use Adaptive Cards to show data in API plugins for declarative agents’ —
Exercise 2 - Update the API plugin definition
The next step is to update the API plugin definition with Adaptive Cards that Copilot should use to display data from the API to users.
Exercise Duration
- Estimated Time to complete: 10 minutes
Task 1 - Add Adaptive Card to display a dish
In Visual Studio Code:
- Open the cards/dish.json file and copy its contents.
- Open the appPackage/ai-plugin.json file.
- To the functions.getDishes.capabilities.response_semantics property, add a new property named static_template and set the body value to the contents of dish.json.
-
The complete code snippet looks like:
"static_template": { "$schema": "http://adaptivecards.io/schemas/adaptive-card.json", "type": "AdaptiveCard", "version": "1.5", "body": [ { "type": "Container", "items": [ { "type": "Image", "url": "${image_url}", "size": "large" }, { "type": "TextBlock", "text": "${name}", "weight": "Bolder" }, { "type": "TextBlock", "text": "${description}", "wrap": true }, { "type": "TextBlock", "text": "Allergens: ${if(count(allergens) > 0, join(allergens, ', '), 'none')}", "weight": "Lighter" }, { "type": "TextBlock", "text": "**Price:** €${formatNumber(price, 2)}", "weight": "Lighter", "spacing": "None" } ] } ] } - Save your changes.
Task 2 - Add Adaptive Card template to display the order summary
In Visual Studio Code:
- Open the cards/order.json file and copy its contents.
- Open the appPackage/ai-plugin.json file.
- To the functions.placeOrder.capabilities.response_semantics property, add a new property named static_template and set its contents to the Adaptive Card.
-
The complete file looks like:
"static_template": { "$schema": "http://adaptivecards.io/schemas/adaptive-card.json", "type": "AdaptiveCard", "version": "1.5", "body": [ { "type": "TextBlock", "text": "Order Confirmation 🤌", "size": "Large", "weight": "Bolder", "horizontalAlignment": "Center" }, { "type": "Container", "items": [ { "type": "TextBlock", "text": "Your order has been successfully placed!", "weight": "Bolder", "spacing": "Small" }, { "type": "FactSet", "facts": [ { "title": "Order ID:", "value": "${order_id} " }, { "title": "Status:", "value": "${status}" }, { "title": "Total Price:", "value": "€${formatNumber(total_price, 2)}" } ] } ] } ] } - Save your changes.
lab: title: ‘Exercise 3 - Test the declarative agent with the API plugin in Microsoft 365 Copilot’ module: ‘LAB 03: Use Adaptive Cards to show data in API plugins for declarative agents’ —
Exercise 3 - Test the declarative agent with the API plugin in Microsoft 365 Copilot
The final step is to test the declarative agent with API plugin in Microsoft 365 Copilot.
Exercise Duration
- Estimated Time to complete: 10 minutes
Task 1 - Provision and start debugging debug
In Visual Studio Code:
- From the Activity Bar, choose Teams Toolkit.
-
In the Accounts section, ensure that you’re signed in to your Microsoft 365 tenant with Microsoft 365 Copilot.

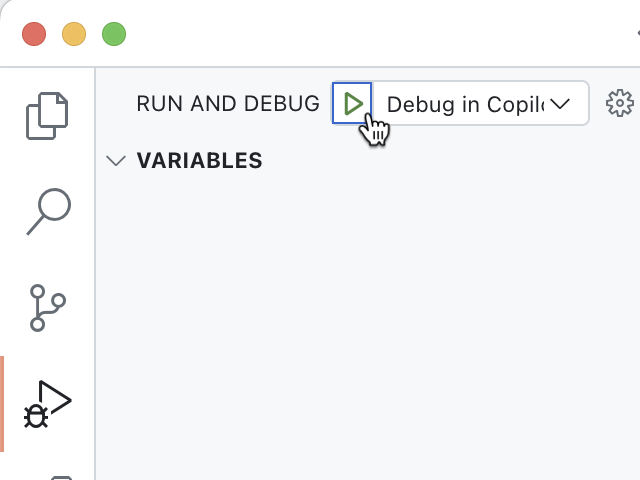
- From the Activity Bar, choose Run and Debug.
-
Select the Debug in Copilot configuration and start debugging using the Start Debugging button.
- Visual Studio Code builds and deploys your project to your Microsoft 365 tenant and opens a new web browser window.
Task 2 - Test and review results
In the web browser:
- When prompted, sign in with the account that belongs to your Microsoft 365 tenant with Microsoft 365 Copilot.
-
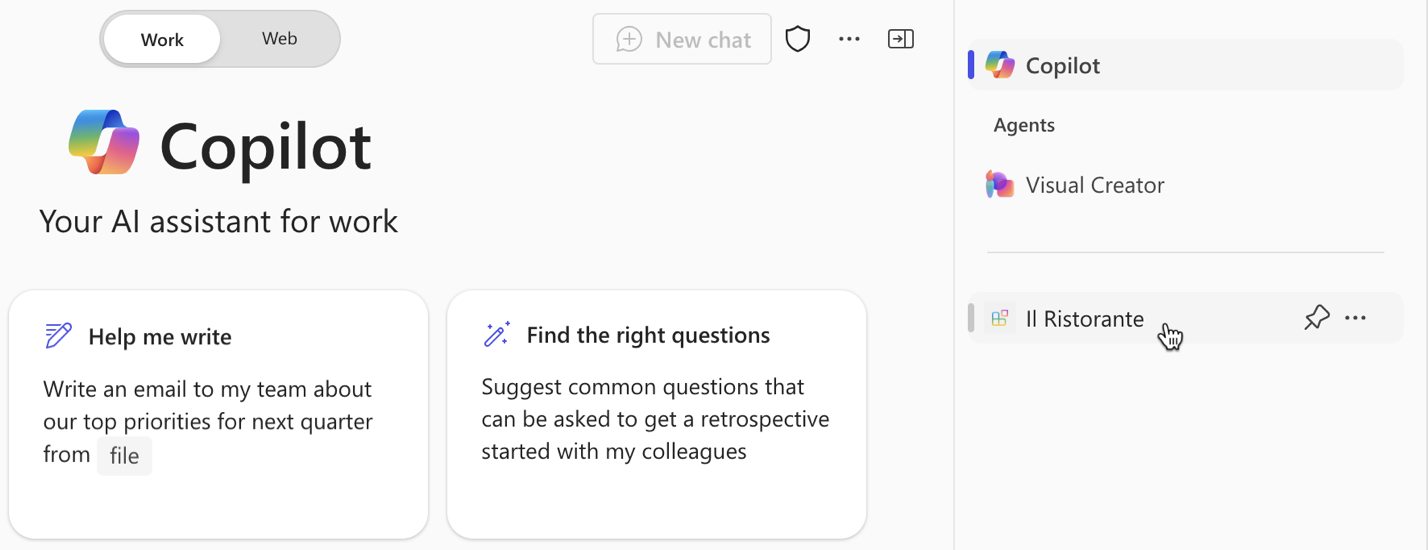
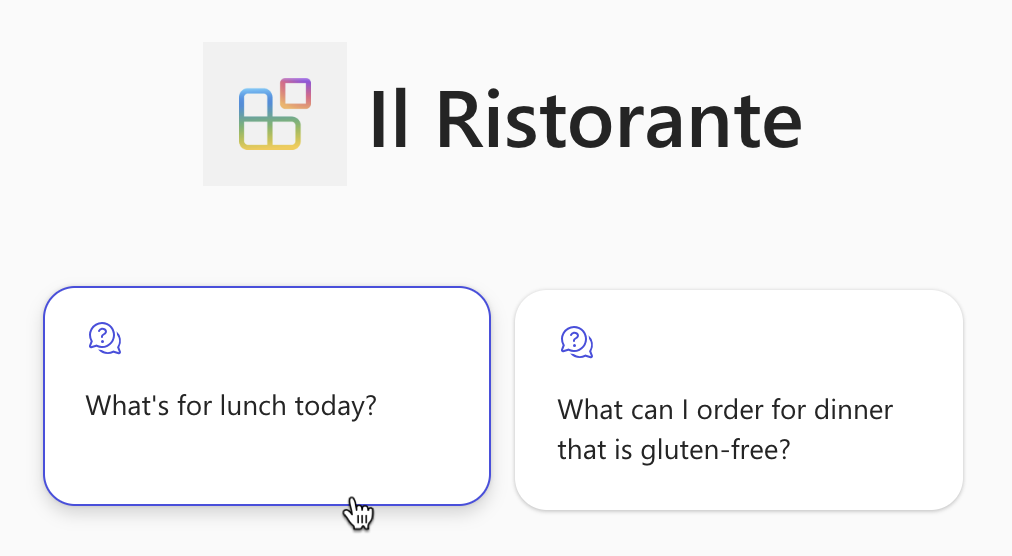
From the side bar, select Il Ristorante.
-
Choose the What’s for lunch today? conversation starter and submit the prompt.
-
When prompted, examine the data that the agent sends to the API and confirm using the Allow once button.
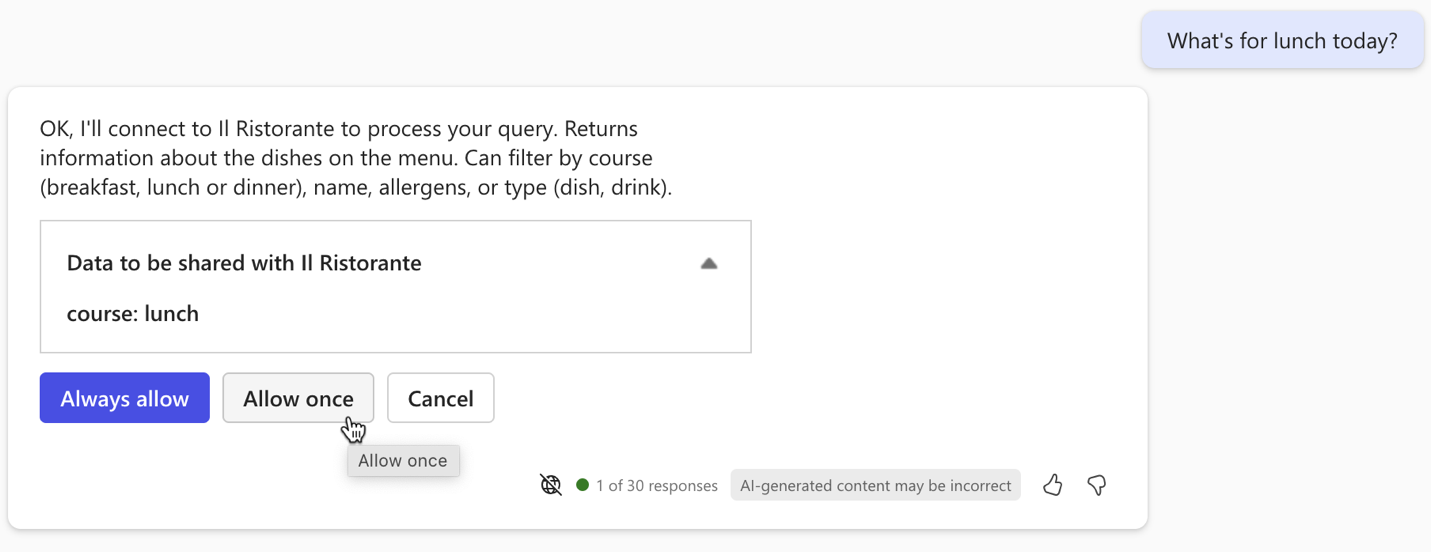
-
Wait for the agent to respond. Notice that the popup on a citation now includes your custom Adaptive Card with additional information from the API.

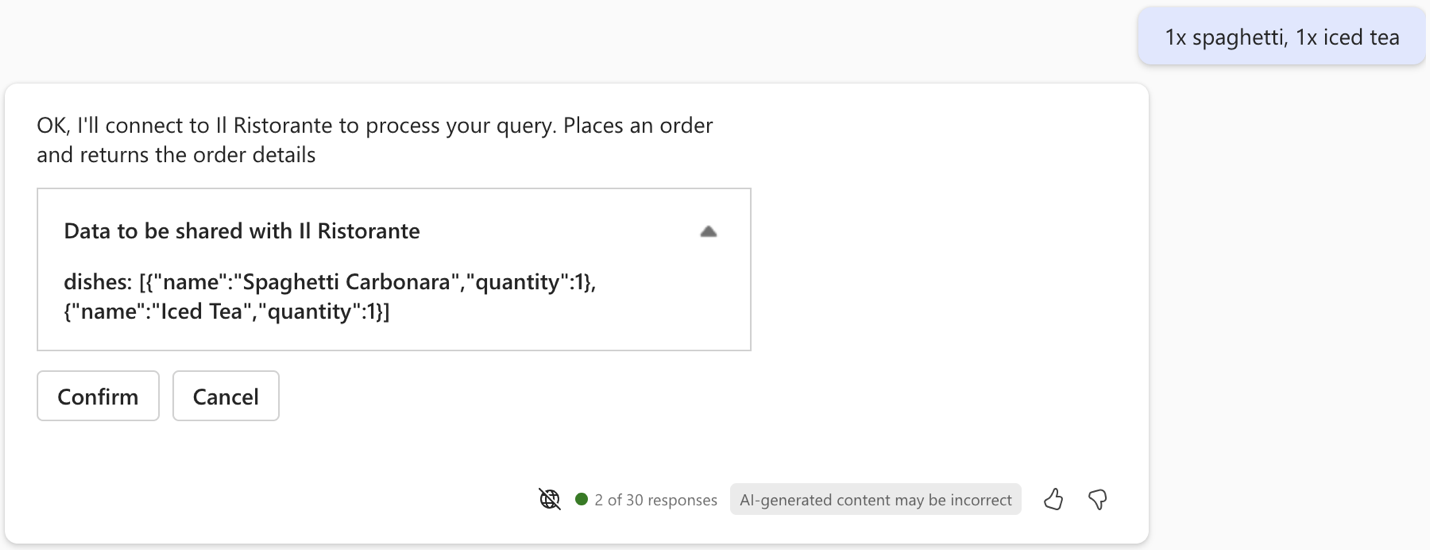
- Place an order, by typing in the prompt text box: 1x spaghetti, 1x iced tea and submit the prompt.
-
Examine the data that the agent sends to the API and continue using the Confirm button.
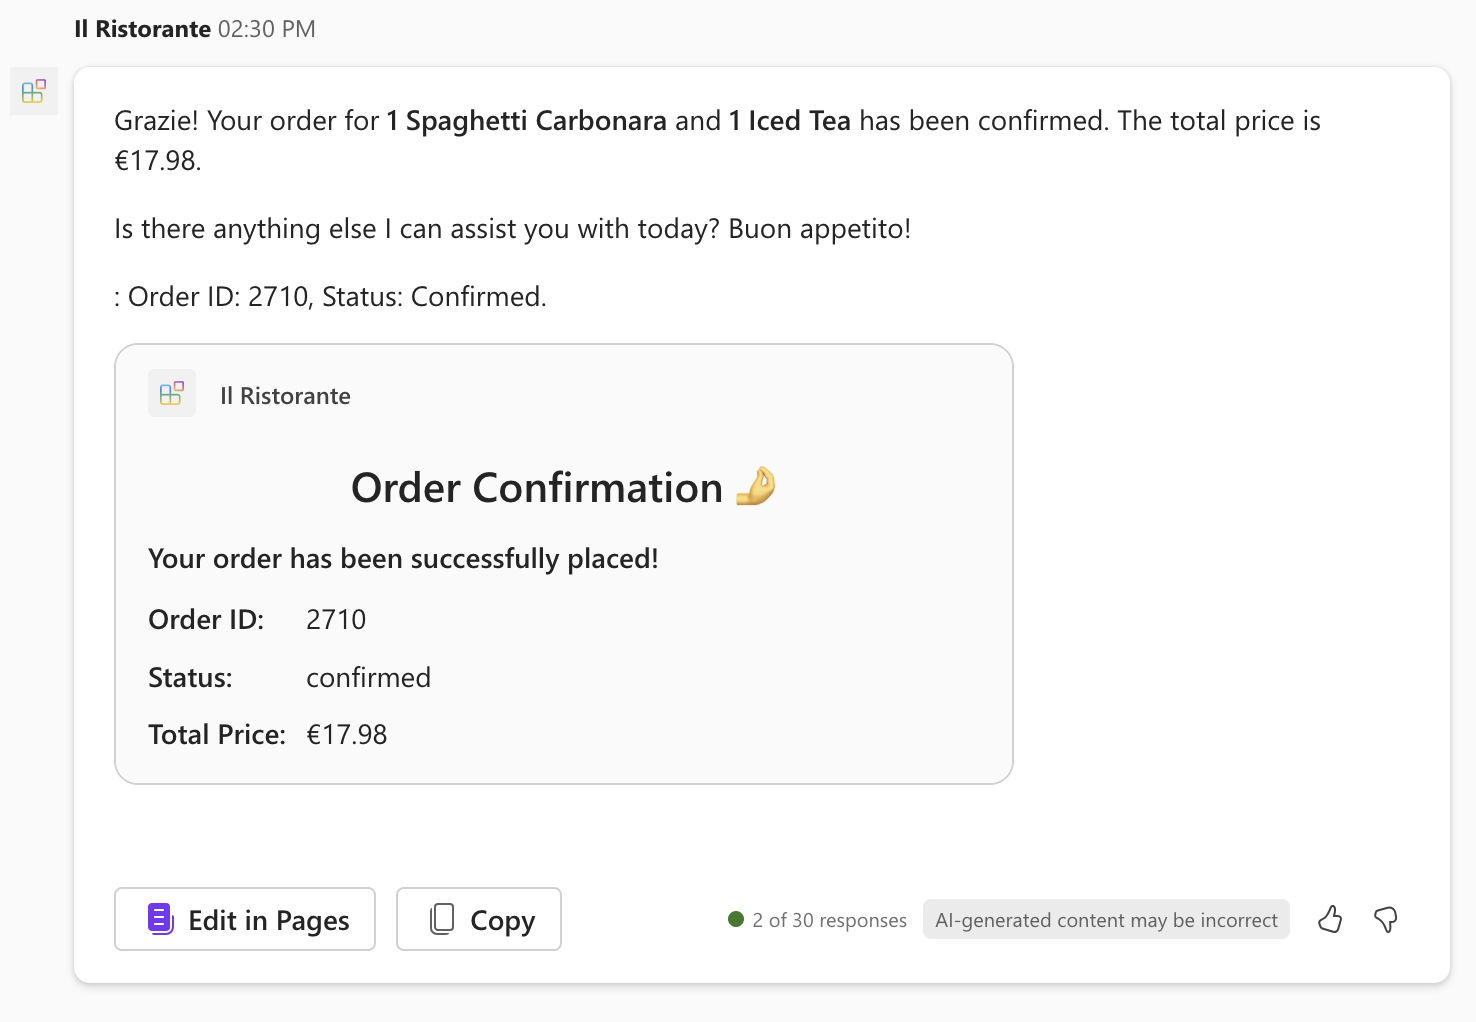
-
Wait for the agent to place the order and return the order summary. Notice, that because the API returns a single item, the agent renders it using an Adaptive Card and includes the card directly in its response.
- Go back to Visual Studio Code and stop debugging.
-
Switch to the Terminal tab and close all active terminals.
You want to improve the user experience when working with your declarative agent. Specifically, you want the agent to present the data that it receives from the API in a rich way.
You did some research and found that extending your agent with using Adaptive Cards to render information is suitable for your needs, because:
- It allows you to build on your existing work.
- It gives you control over how the agent presents the data.
- It allows you to present the data in a visually appealing way.
- It allows you to include information beyond the few basic semantic properties that the agent supports.
Previously, when exploring the menu, you had to rely on the textual description of the dish.
By using Adaptive Cards, you can include images, text, and buttons to make the information more engaging. You can also render the order summary using an Adaptive Card to provide a visual representation of the order.